Sunday, December 25, 2011

Have Yourself a Merry Little Christmas

Merry Christmas to you!  I hope everyone out there is having a lovely holiday. 


Here is some Michael Buble to spread the cheer. I went to the dress rehearsal of Saturday Night Live last week, where he was the musical guest. I didn't get it before but now I do. I love Mr. Michael Buble. Liquid Gold, that voice. Anyway, have fun!!


Wednesday, December 21, 2011

Secret Santa Fail (but a yummy recipe!)

We had Secret Santas at work last week, and I nearly killed mine. 


For a little surprise, I decided to make him some sweet treats, and tried out 
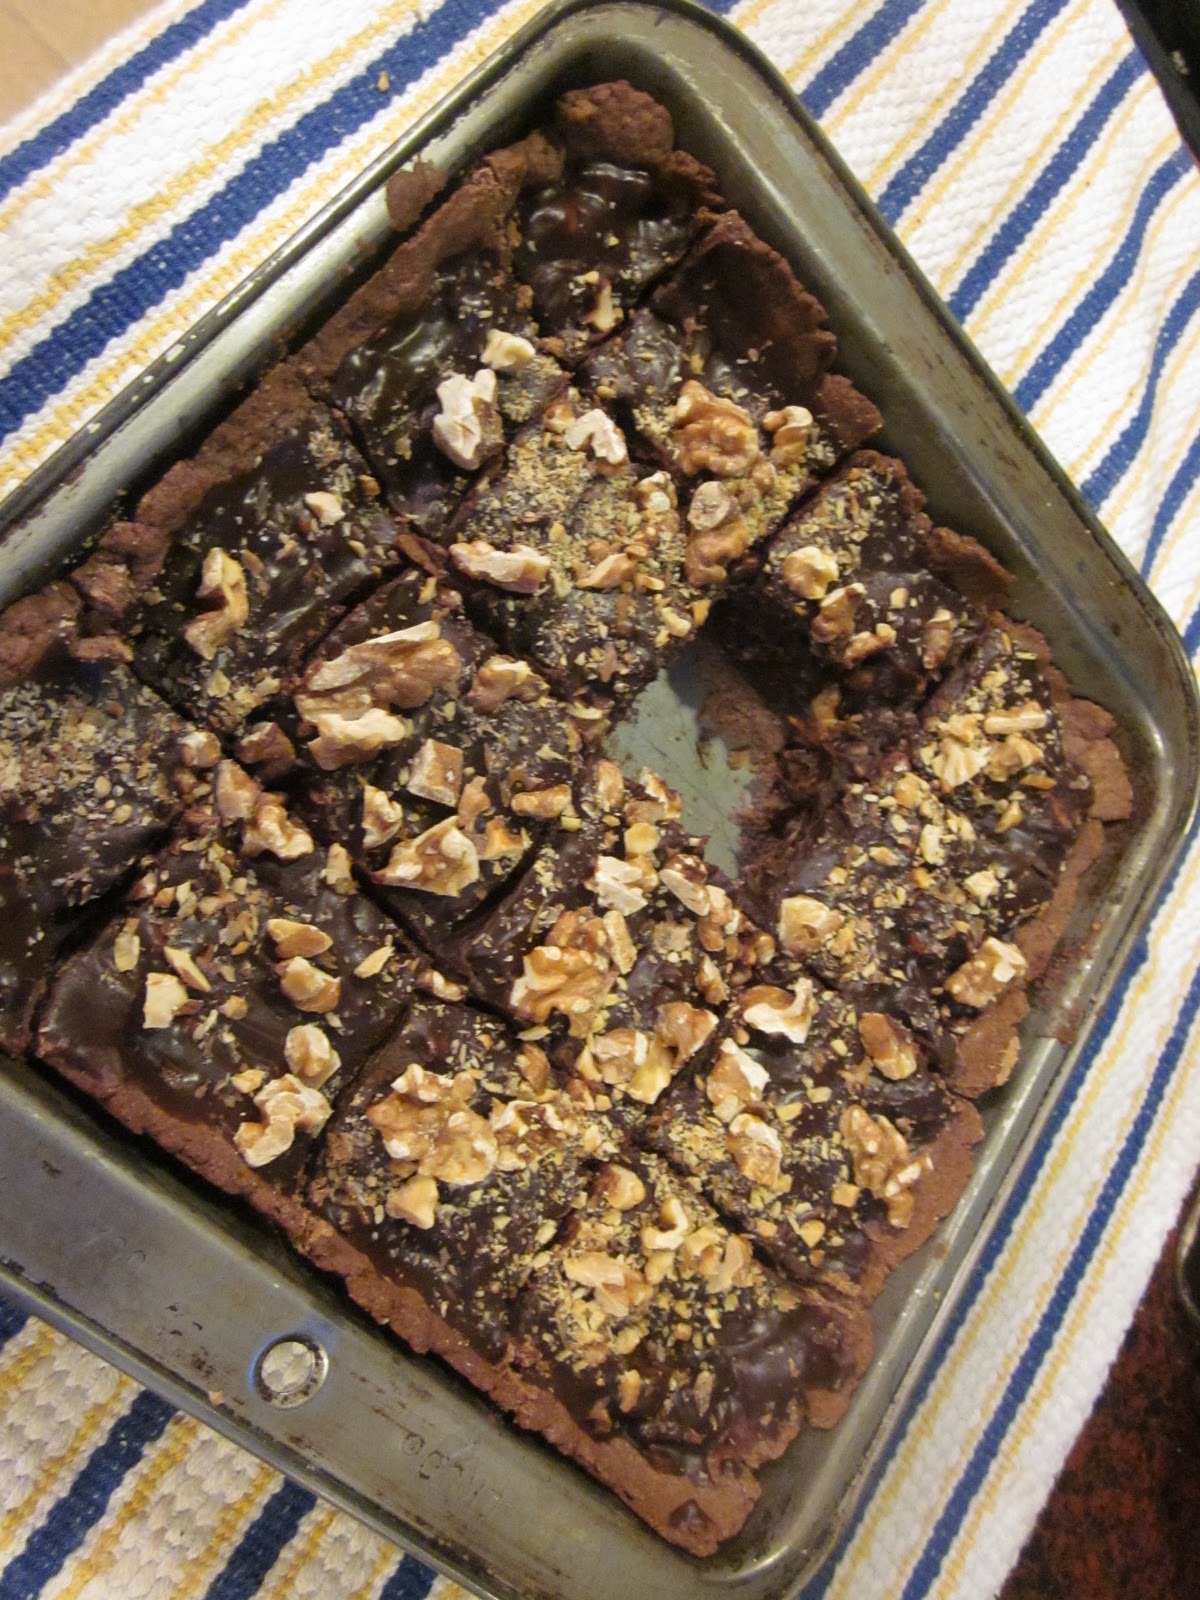
this recipe from Real Simple, for a Chocolate Pecan Tart.  Little did I know that he was allergic to nuts.  Yikes.  Luckily it was pretty clear from looking at them that they had nuts so he didn't eat any.  But I felt TERRIBLE and couldn't even apologize until a few days later because that would reveal my identity!  (I did make him some chocolate chip cookies to make up for it.)

Anyway, I sampled the recipe and it was really good!  If you like/aren't allergic to nuts.  I used walnuts instead of pecans because that is what I had, and added some extra chocolate chips and cream to fill out the larger pan I had used.  But overall, it was delish!  Try it yourself...makes a nice gift too, if you know your audience's dietary restrictions.  (So sorry, Frank!!!!)

Chocolate Pecan Tart
from Real Simple


serves 8     Hands-On Time: 15m      Total Time: 2hr 30m

Ingredients
1 3/4 cups pecan halves (I used walnuts)
1 1/4 cups all-purpose flour, spooned and leveled
1/4 cup unsweetened cocoa powder
1/2 teaspoon kosher salt, plus a pinch for the filling
1/2 cup (1 stick) unsalted butter, at room temperature
1/4 cup sugar
2 large egg yolks
1/2 pound semisweet chocolate, chopped (I ended up using an entire bag of chocolate chips, which is 4 oz more than 1/2 lb)
3/4 cup heavy cream (added some extra cream too, to melt the additional chips)

Directions
1.Heat oven to 350° F. Spread the pecans on a rimmed baking sheet and toast, tossing once, until fragrant, 6 to 8 minutes. Let cool, then roughly chop. In a medium bowl, whisk together the flour, cocoa powder, and salt.

2.Using an electric mixer, beat the butter and sugar on medium-high until creamy, 2 to 3 minutes. Beat in the egg yolks. Reduce mixer speed to low and gradually add the flour mixture; mix until combined but still crumbly.

3.Press the dough into the bottom and up the sides of a 4-by-14-inch rectangular (or 9-inch round) tart pan.  (I used a square 8x8 inch baking pan.)  Line with a large piece of parchment paper, leaving an overhang on all sides, and fill with dried beans or pie weights.  (I didn't have parchment and couldn't find my pie weights, so I skipped that.  The crust was a little puffy but it worked out fine.)  Place the pan on a rimmed baking sheet and bake until the edges of the crust are dry, 20 to 22 minutes. Remove the parchment and beans and bake until dry and set, 10 to 12 minutes. Let cool completely.

4.Meanwhile, in a large bowl, combine the chocolate and pinch of salt. In a small saucepan, bring the cream to a bare simmer; pour over the chocolate and let stand 1 minute. Stir gently until the mixture is smooth. Stir in 1½ cups of the pecans. Pour the mixture into the cooled tart shell and sprinkle with the remaining pecans. Refrigerate until set, at least 1 hour.

Tuesday, December 20, 2011

...And because I don't want to start WWIII...

I put this one together last night for a special young man who is learning his letters this year. 

Ok.  I need to stop.  These kids are going to be SO spoiled!  But that is what being an aunt is about, right? 

Monday, December 19, 2011

Pillow Talk

 Here is a fun little quilty pillow I whipped up for my niece Rakia.  I think she'll like it!  It has lots of fun patterns with ladybugs and cats and critters and what not.  It was so simple to put together too!  I used a bunch of scraps, cutting them into 3x3 inch squares, using 25 total. 


I sewed them in 5 rows of 5, then stitched each row to the next to make the front.  For the back I just used some larger pieces of scrap fabric, following the idea of this awesome super easy pillow cover tutorial from Sparkle Power

So, even if you haven't finished your Christmas shopping ...you still have time to put together one (or ten) of these for a great handmade gift!  For the inside you can use pillow forms or, I buy cheap pillows at Ocean State Job Lot (or whatever discount store you might have) for $5 (or less) each, then just cover them in a fun fabric myself. 

Yay!  Pillow fight! 


Sunday, December 18, 2011

Berry Bread

I was in a bread bakey kind of mood today, but couldn't find yeast at Pathmark.  I know it's there somewhere, but it was so crowded and crazy I couldn't deal with the search. 


But I did recall that I had wanted to try this recipe from Real Simple and had the ingredients on hand...kind of.  (Another instance of couldn't find something at Pathmark...this time I subbed a frozen berry blend for cranberries.)


It came our pretty well!  Tasty.  Although next time I might use walnuts instead of hazelnuts.  They seemed a little unwieldy and I think walnuts would work a little better.  But give it a shot!  This would make a nice gift loaf for the holidays...or anytime!

Emma's Attempt at Cranberry Hazelnut Bread
From Real Simple


Serves 8
Hands-On Time: 10m
Total Time: 2hr 30m

Ingredients
1 cup hazelnuts (again - I might try walnuts next.  Pecans or other nuts would probably work well too)
2 tablespoons unsalted butter, melted, plus more for the pan
1 1/2 cups all-purpose flour, spooned and leveled
1/3 cup granulated sugar
1/4 cup packed light brown sugar
1 tablespoon baking powder
1/2 teaspoon kosher salt
1/2 cup whole milk (the mixture seemed a little dry - I added a few tablespoons additional milk)
2 large eggs
1 tablespoon finely grated orange zest
1/2 teaspoon pure vanilla extract
1 1/2 cups fresh or frozen cranberries (I used frozen berry blend)

Directions

1.Heat oven to 350° F. Spread the hazelnuts on a large rimmed baking sheet and toast in oven, tossing occasionally, until fragrant, 10 to 12 minutes. Rub the warm nuts in a clean dish towel to remove the skins (discard the skins); coarsely chop.  (I let the nuts cool before removing the skins - try it when they are still warm.  It will make life easier.)

2.Butter an 8½-by-4½-inch loaf pan. In a medium bowl, whisk together the flour, sugars, baking powder, and salt. In a small bowl, whisk together the butter, milk, eggs, orange zest, and vanilla; add to the flour mixture and mix until just combined (do not over mix). Fold in the hazelnuts and cranberries.

3.Transfer the batter to the prepared pan and bake until a toothpick inserted in the center comes out clean, 55 to 65 minutes (tent with foil if the top browns too quickly). Cool in the pan for 30 minutes, then transfer to a wire rack to cool completely.


Friday, December 16, 2011

Baby Bedding

 My little niece Rakia is pretty cute. 
Even when she is a goofball.  (Or, especially then.)  So for Christmas I wanted to make her something super adorable.  She loves her baby dolls, so I thought I'd whip up a little bed for them to take a rest - here is my experiment!

 
 Sweet, huh?  I wrapped an empty clementine cake in fabric, then made a little mattress and pillow out of scraps (and filled with smaller scraps.  The project was basically free - since I already had all the materials on hand!
 To top it off and keep the little baby toasty warm, I made a reversible quilt.  I really hope Rakia likes it!  I think she will. 

Wednesday, December 14, 2011

Christmas Countdown Calendar!

Happy Holiday Season Everyone! 

I wanted to share a fun craft I put together for celebrations.com, and that my lucky niece and nephew, pictured here:

are enjoying this month. 


I had a fun time making it - and as always, it was really inexpensive and relatively simple to put together.  Selecting tiny treats to fill it was SO fun too! 

Check out this post to see how I did it! 

Happy December!